Introduction
This is part of a series of articles describing the creation of a simple iOS app. A complete list of the articles is included in the first part A Simple Swift iOS App from Start to Finish - Introduction.
I have set up a web site for the finished app at http://DaysWithoutThings.com and you can download it free directly from the app store:
I have set up a web site for the finished app at http://DaysWithoutThings.com and you can download it free directly from the app store:
In this article I am going to create my list view which will enable the user to add and remove 'things' from my app.
The steps involved are:
Add a new TableView to my storyboard.
Add a NavigationController to my storyboard.
Add a Tap Gesture to my main view.
Add a new TableViewController subclass for the new table view.
Adding a TableViewController
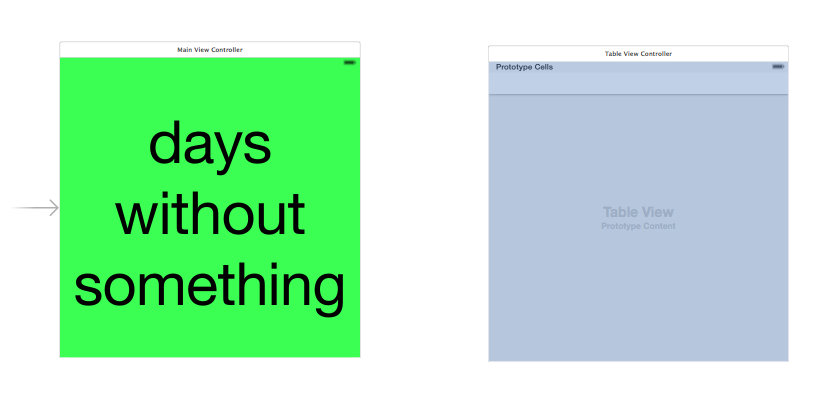
I am going to start by adding a new TableViewController to my storyboard. To do this I select Table View Controller in the Object Library and drag a new instance onto my storyboard next to my Main Display View.

This creates a couple of warning messages which I will deal with later/

Adding a Navigation Controller
I am going to connect my new Table View to my Main View with a Tap Gesture. Before I can do that I need to add a NavigationController to my storyboard. The way I am going to do this is to select my Main Display View Controller in the storyboard and then select 'Embed in' | 'Navigation Controller' from Xcode's Editor menu.

This creates a new warning:


Adding a Tap Gesture
My app will use a tap gesture on the main view to give the user access to the list view. I am going to implement this now. To start with I am going to select my Main View Controller in the storyboard and then drag a tap gesture recognizer from the Object Library on to it.


To actually make the connection I right click the Tap Gesture in the storyboard object tree and drag from the empty circle next to Triggered Segue | action to my Table view and select show from the popup that appears when I release the mouse over my Table View.


To ensure the tap gesture is processed I need to change the gesture recognizer from the label to the view.

Adding this connection to the Table View fixes one of the warnings that appeared after I added the Table View Controller to the Story board. I am know going to fix the remaining warning.
Fixing the Prototype Cell
The last warning is that my prototype cell does not have a reuse identifier.
I am going to select the default prototype Table View Cell in the storyboard's object tree and set a reuse identifier in the Attributes inspector.

Adding the Navigation Item
If I run my app in the simulator my new list view is automatically given a Navigation Bar. However I have no way of configuring that bar through Interface Builder I will fix this by adding a Navigation Item to my Table View Controller in the storyboard.

Unfortunately Interface Builder does not actually display the navigation item as part of the view so I can only configure it via the object tree. When I select the Navigation Item in the object tree I can use the Attributes Inspector to set a title for it. This title will appear at the top of the table view when the app is running.
Unfortunately Interface Builder does not actually display the navigation item as part of the view so I can only configure it via the object tree. When I select the Navigation Item in the object tree I can use the Attributes Inspector to set a title for it. This title will appear at the top of the table view when the app is running.

I want it add the standard Add button to my table view's navigation bar. To do this I just need to drag a Bar Button Item from the Object Library on to the Navigation Item in the object tree.

To set the new bar button item to be an Add button I just need to select it in the object tree and change its identifier from Custom to Add in the Attribute inspector.

When I run my app now and tap the main display screen I see my new Table View with its title and Add button.

Adding a new TableViewController Subclass
I am going to add a new UITableViewController subclass to hold the code for my new list view. I can do this by right clicking on my project's folder in the Project navigator and selecting new file followed by Swift file.

I will set the filename to ListTableViewController.swift and click 'Create'.

This creates a new empty swift file. I am going to add the definition for my UITableViewController subclass and save the file.
import Foundation
import UIKit
class ListTableViewController: UITableViewController {
}
The final step is to set my the custom class for the List View in the storyboard to my custom class. If the new class name does not appear in the drop down list of classes I may need to use the Clean and Build options from Xcode's main Product menu to force it to recompile my app. This should refresh the list of available classes in Interface Builder.

Wrapping up
The UI for my main view is nose complete. Before moving on I am going to run my app in the Simulator with a few different device profiles to check that the list view and its navigation bar look correct and to make sure it still compiles. I will then commit it to source control.
In my next article I will create the UI for the Edit View.
Next: A Simple Swift iOS App from Start to Finish - Creating the Edit View
In my next article I will create the UI for the Edit View.
Next: A Simple Swift iOS App from Start to Finish - Creating the Edit View
Next: A Simple Swift iOS App from Start to Finish - Creating the Edit View
No comments:
Post a Comment